ACP analyzes the space each rack will occupy and flags any potential clashes. Unlike Automatic Routing, Interactive Routing generates conduit routes regardless of obstructions, giving you full control to decide which elements may be penetrated and which must be avoided.
Locate and identify obstructions
Assigned Segments make up the raceway route that connects a Source and Destination. They are visualized with a Rack Preview which shows the estimated space requirement to place the conduits connected to the same rack.
 The Clash Detection feature in Interactive Routing helps you locate Assigned Segments with an obstruction in their path, and the estimated space required for the conduit rack of the Rack Preview.
Follow the steps below to locate and identify obstructions along Assigned Segments.
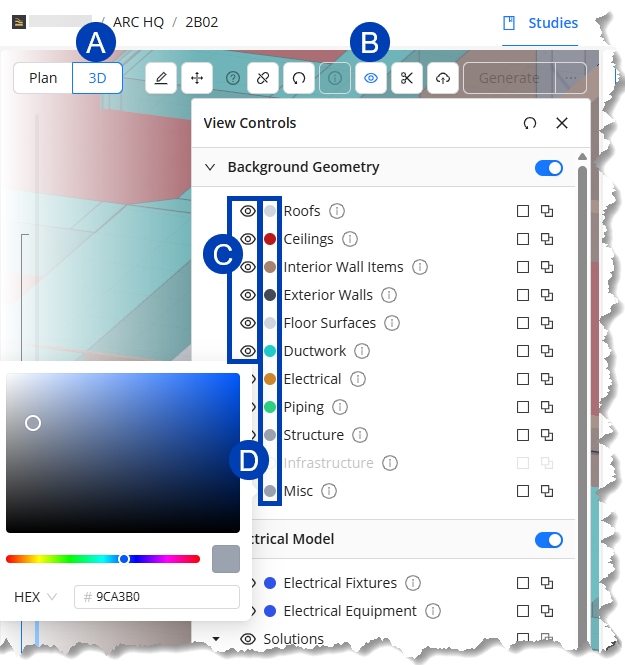
Switch to
 3D view.
This lets you see both horizontal and vertical segments.
Click the
 View Controls button.
Ensure that the
 Visibility toggle for each category groups in the Background Geometry section are enabled.
(Optional) Click the
 color selector of each category group then choose a different color for each one.
This lets you easily identify each category in the site.
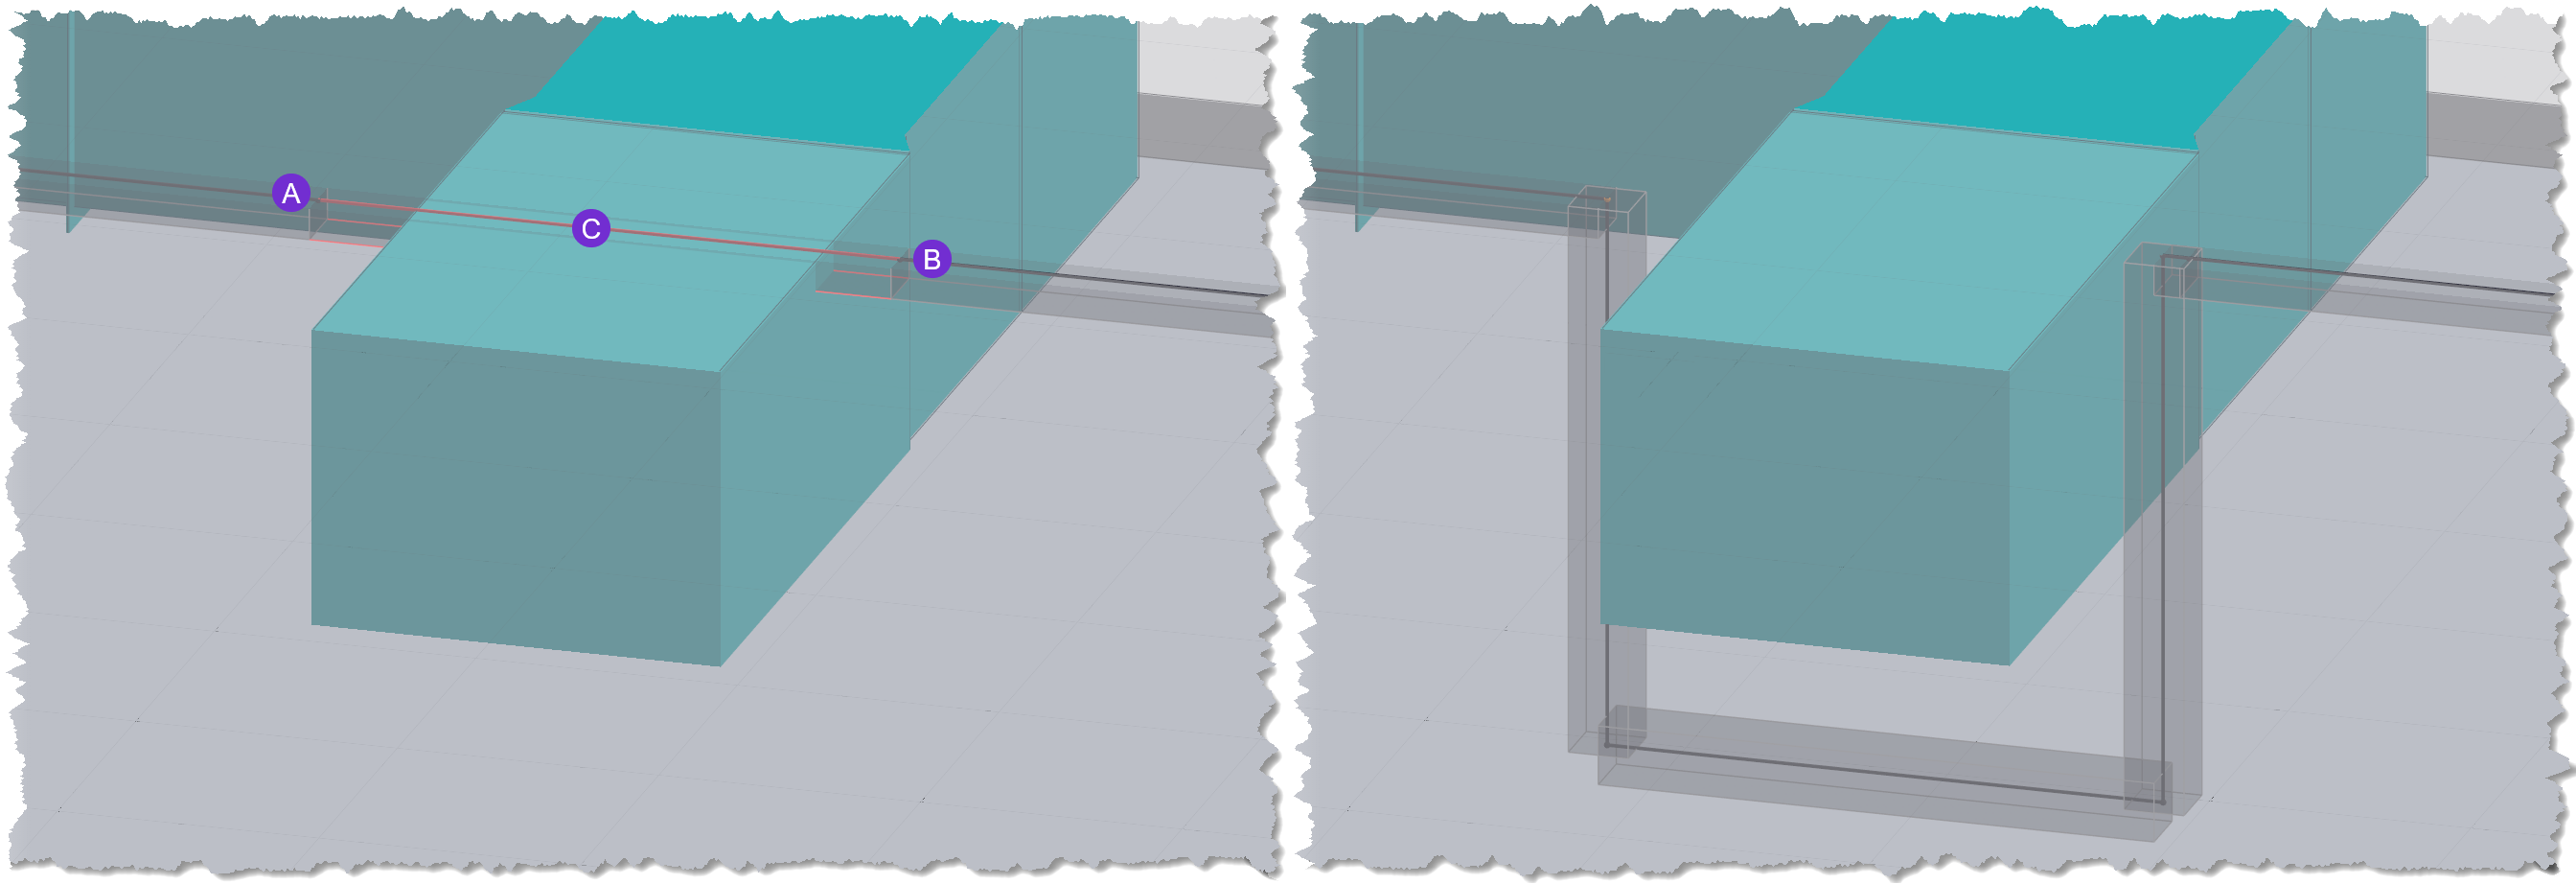
In the 3D Model Viewer, locate any segment that’s highlighted in red.
Review the entire length of the segment to find where it clashes with other geometry.
Walls aren’t considered as obstructions.
Once you’ve located and identified the obstructions, you can decide whether to route around the obstruction or allow conduit to penetrate it.
Route around obstructions
To modify Assigned Segments in the route so they avoid obstructions, follow the steps below.
Locate the obstruction blocking the Assigned Segment.
Switch to Draw mode by clicking the Draw button in the Mode Selector.
Or press D on your keyboard.
Draw a waypoint on either side (such as
 and
and  ) of the obstruction.
This isolates the
 obstructed portion of the segment so it’s the only portion highlighted in red.
Delete the isolated portion.
Reconnect the remaining two segments by drawing the new segments around the obstruction.
Press the Shift key while drawing the segment to use standard bend angles.
Next Steps
Once Routes have been accepted or completed conduit may be Generated, modified, and finally exported to the Revit Project. See the Next Article to see how.