The ACP Revit add-in connects the Augmenta Construction Platform (ACP) to Revit, enabling data transfer between the Revit project and the ACP Workspace. This includes actions like importing the Electrical Model and Background Model as well as exporting ACP conduit solutions into the Revit project.
This guide provides step-by-step instructions for how to install the ACP add-in for Revit after downloading it.
Install the Add-In .png)
Ensure there are no Revit sessions running.
 You won’t be able to start the installation if there’s a Revit session open.
 In your system’s file manager, navigate to the downloaded ACP installer, then double-click the file to launch it.
Click
.png) Install.
Install. Select either
.png) Full Install or Custom:
Full Install or Custom:
Full Install installs ACP for all supported versions of Revit (2020 - 2025) on your machine:.
Select the Full Install option in the dropdown.
Click
.png) Next.
Next.
The Custom install option allows you to select which version(s) of Revit you want to install ACP for.
Select the Custom option in the dropdown.
Click Next.
Check the checkbox next to versions of Revit you’d like to install ACP for.
Click
Next.
.png)
When prompted, enter your
.png) Workspace URL:
Workspace URL: (1).png)
Your workspace URL is provided to you in the About tab of your ACP Workspace, or in your Welcome Email.
Click
.png) Next.
Next. In the next window, review the installation settings.
Select Install to proceed with the installation.
Once installation is complete, select the
 Finish button to exit the Setup Wizard.
You can launch Revit directly from the installer by selecting the
 Launch Revit 20XX checkbox before selecting Finish.
Load Add-in in Revit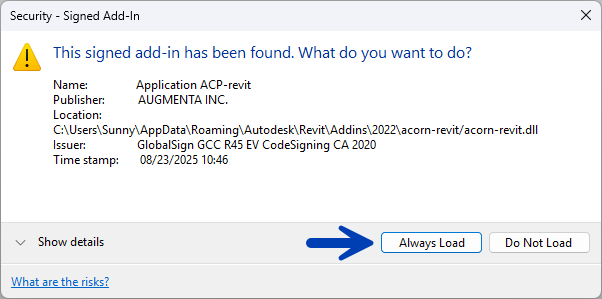
When you open Revit for the first time after installing the ACP Revit add-in, you may see a Security – Signed Add-In dialog box:
Check that the Publisher is listed as AUGMENTA INC.
Select the Always Load button.
This will load the add-in in Revit and close the dialog box. The dialog will not appear the next time you open Revit.
Next Steps
After installing the Revit add-in, you can proceed to Launching and Logging Into ACP.