Modeling conduit racks is one of the most tedious and time-consuming processes known to those who work in Revit. It involves painstakingly completing multi-step processes including manually placing, copying, spacing, and trimming each individual conduit within a given rack. As coordination progresses, these processes have to be repeated hundreds of times. Even with the most efficient modeling practices, this can take teams weeks, sometimes months, to complete. On top of that, tracking data through Conduit Runs is a challenge that Revit's native tools have never been able to solve.
Whether you are manually modeling conduit from scratch, or modifying the ACP generated conduit during the coordination process, the Edit tools in the ACP Revit Add-In help to cut down many of the manual steps required during the conduit modification process which slow the modeling process down considerably.
These tools are available within the Edit panel in the Augmenta tab without the need to launch and log into ACP. 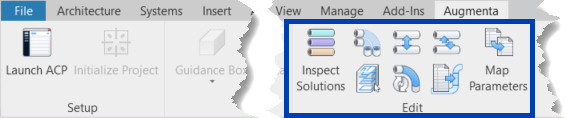
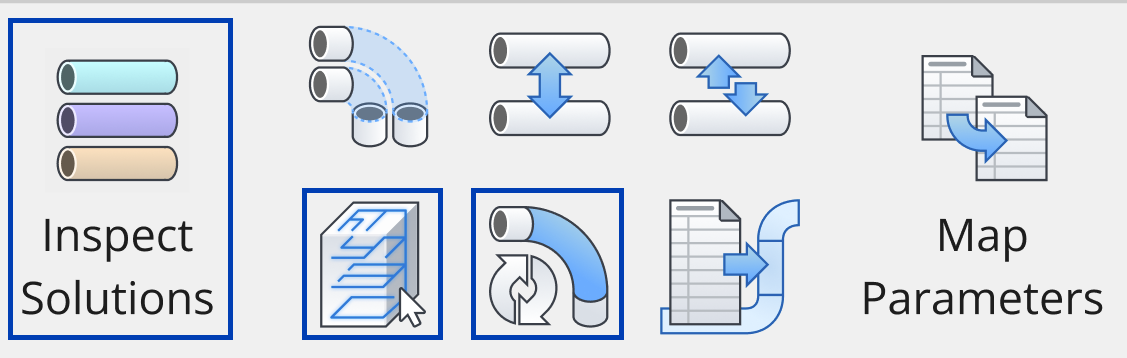
 Inspect Solutions - Creates view filters for multiple properties of a selected parameter
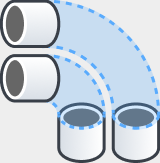 Trim Conduit - Places the needed conduit and conduit fittings to connect segments of conduits and racks together
 Space Conduit - Adjusts the spacing between conduits in a rack based on the conduit size.
  Swap Conduit - Exchanges the position of segments from two runs of conduit within a rack
 Select Generated Conduit - Selects all elements in the Revit project which were exported from an ACP solution
 Convert Bends - Changes all ACP bends to a custom bend family
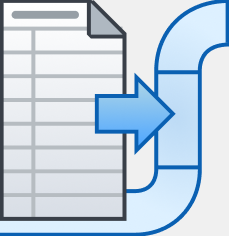 Push Properties - Updates conduit runs to have consistent properties in the model and schedules
 Map Parameters - Transfers parameter values from a source parameter to a target parameter within selected elements
PRO TIP:
Because the Space Conduit, and Swap Conduit tools change the physical placement of the selected conduit within the project, the connecting conduit may be inadvertently adjusted as well.
To avoid this, do the following:
Delete the bends at major junctures where the segments to be modified connect to other conduits within the runs in the rack.
Make the Swap and Spacing changes to that section of the rack
Use the Trim Conduit tool to replace the needed bends for that section of the rack.
Working with Parameters
The Edit tools are designed to be used with both Conduit generated by ACP and exported into the Revit project, and conduit which has been manually modeled by the user. It does this in a couple of ways.
When ACP specific parameters are present within the Conduit Runs, those parameters will be prioritized and organized within the specific command.
For example: the Trim Conduit command will trim conduits which share the same ACP Run ID, even when the positions are immediately apparent for trimming, The Inspect Solutions tool will list the ACP specific parameters first, and the Convert Bends tool will transfer the ACP parameters to the converted bend elements.
Tools which modify Conduit Run properties in any way (IE: Converting or replacing a bend which would clear data, or pushing parameter values through the project), are designed to ensure all updated property values are consistent throughout the Conduit Run and its associated Conduits and Conduit Fittings.
The property updating process is NOT limited to ACP parameters, and will work for most Text parameters assigned to all three conduit categories (Conduit, Conduit Fittings, and Conduit Runs), including custom-made parameters.
Activating each Edit tool
As with the Revit native modify commands, some of the ACP Edit tools are Project Driven, and some are Selection Specific.
Project Driven
 These tools apply to conduit elements across the project, regardless of any selection set, typically based on view visibility.
Inspect Solutions
Select Generated Conduit
Convert Bends
These tools may be activated by clicking on the tool from the Edit panel inside the Augmenta tab.
Additional options and settings may appear prior to applying the tool to the project, typically through a window or panel.
Selection Specific
 These tools apply to specific conduit or elements which are selected or included in a selection set from within a view or a schedule.
Trim Conduit
Space Conduit
Swap Conduit
Push Properties
Map Parameters
Selection Specific tools may be activated in one of two ways:
Selecting the tool first
Click on the desired tool from Edit panel in the Augmenta tab.
This starts the activation process, but the tool is not fully active until the selection is made.
Use the Revit-native selection process to select the desired conduit segments or runs from the model view or schedule.
Click Finish button from the Options Bar to finalize the selection and activate the tool.

Selecting the elements first 
Use the Revit-native selection process to select the desired conduit segments or runs from the model view or schedule.
Revit will automatically open the Modify tab which contains various modify tools, including the Selection Specific Edit tools.
Click on the desired tool from the Augmenta panel in the Modify tab.
This finalizes the selection and activates the tool.
Because selecting the tool first requires additional steps, selecting the elements first tends to be the preferred workflow, and will be the workflow used in the articles for the Selection Specific tools