Managing studies effectively helps you keep track of key project information and avoid unnecessary rework. Open, duplicate, archive, or delete studies to keep your workflow clear and your project space under control.
This guide explains how to use the Duplicate, Archive, and Delete features for studies.
Open an existing study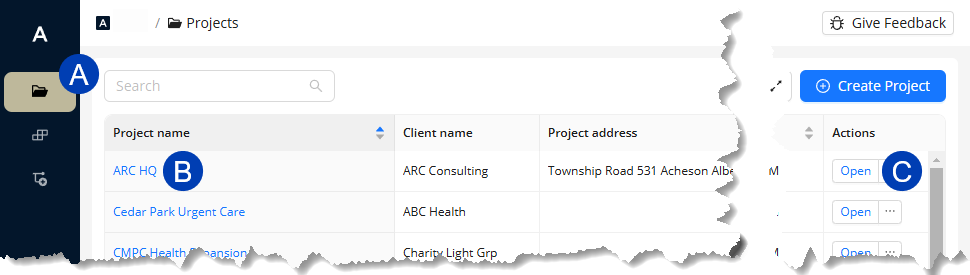
To open an existing study in your ACP Workspace:
Navigate to the
.png) Projects tab.
Projects tab.Open an existing project in one of two ways:
Click the
.png) project name.
project name.Under the Actions column, click the
.png) Open button for the project you want to open.
Open button for the project you want to open. 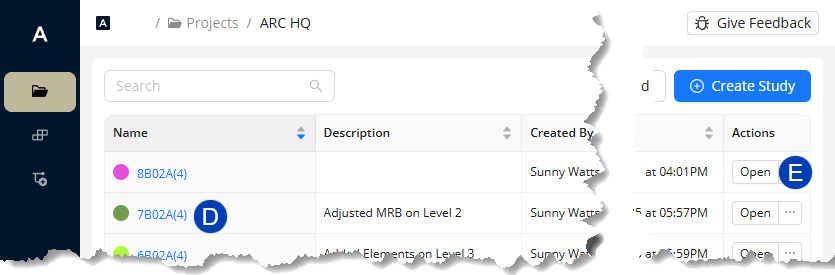
In the Project view of the selected project, open an existing study in one of two ways:
Click the
.png) study name.
study name.Under the Actions column, click the
.png) Open button for the study.
Open button for the study.
This opens the Study view
Duplicate a study
Duplicating a study creates a copy of the original in which all data, except the study name and color, are replicated. You can then update any information within the study and generate a new solution based on it, allowing you to quickly iterate studies for exploring various conduit routes without needing to recreate the study from scratch.
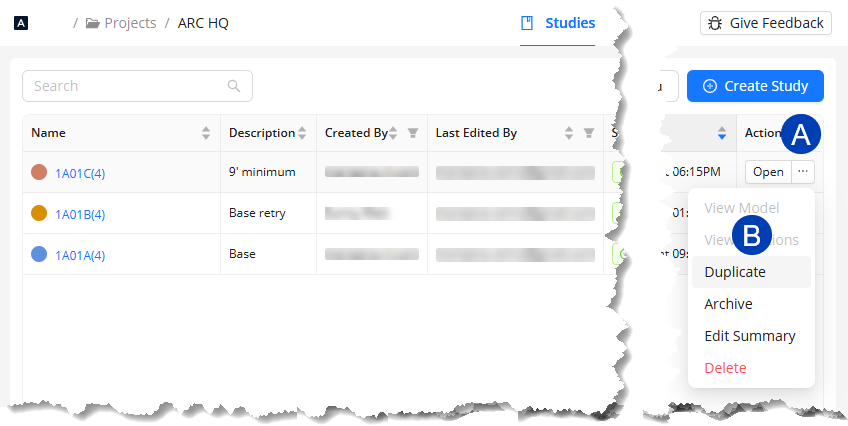
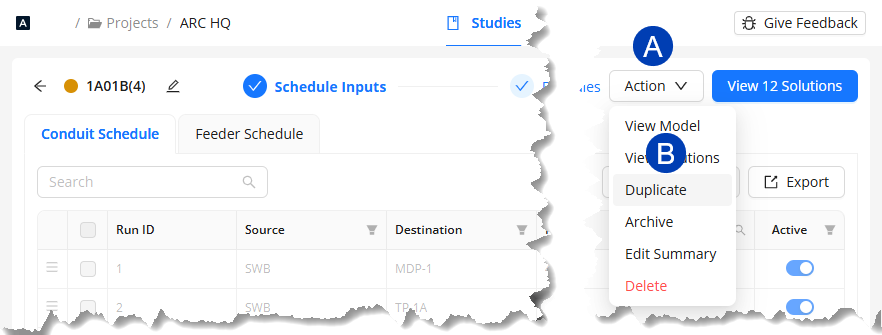
 Within the Study View, duplicate studies may be made once the study has finished generating solutions. Here’s how:
Hover your mouse cursor over the
.png) Action dropdown at the top.
Action dropdown at the top.Select the
.png) Duplicate option.
Duplicate option.In the Duplicate study pop-up, enter a
.png) Name for the duplicate.
Name for the duplicate.  PRO TIP: Use a naming convention for duplicating studies to keep track of the changes you make in each iteration.
 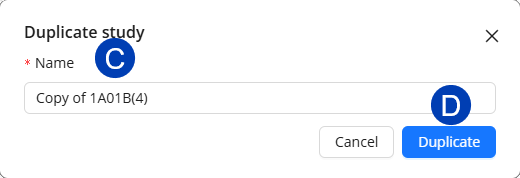 Click the
 .png) Duplicate button to create a copy of the study.
Duplicate button to create a copy of the study.Or select Cancel to exit the pop-up.
 From the Studies List within the Project view, a study can be duplicated at any stage of the ACP workflow. Follow the steps below.
Under the Actions column, hover your mouse cursor over the
.png) ellipsis for the study to be duplicated.
ellipsis for the study to be duplicated.Select
.png) Duplicate from the dropdown options.
Duplicate from the dropdown options.In the Duplicate study pop-up, enter a
Name for the duplicate. PRO TIP: Use a naming convention for duplicating studies to keep track of the changes you make in each iteration. - Click the Duplicate button to create a copy of the study.
Or select Cancel to exit the pop-up.
Archive a study
Archiving a study preserves past work for future reference, but removes the study from the Active Studies table.
 In the Study view, you can only archive a study with generated solutions. Here’s how:
Hover your mouse cursor over the
Action dropdown at the top.Select the
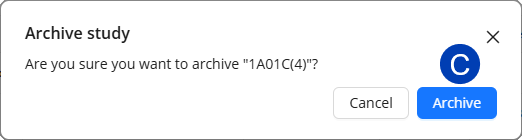
Archive option.In the Archive study dialog box, select the
.png) Archive button.
Archive button.Or select Cancel to exit the dialog box.
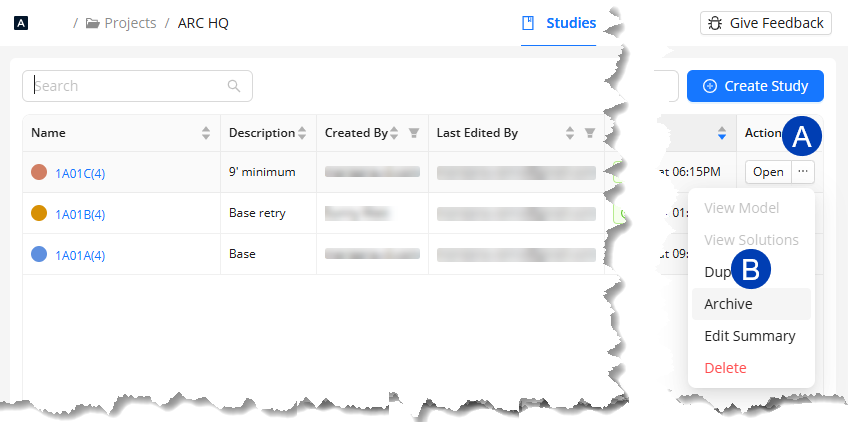 From the Studies table within the Project view, a study can be archived at any stage of the ACP workflow.
Follow the steps below.
Under the Actions column, hover your mouse cursor over the
ellipsis for the study to be duplicated.Select
Archive from the dropdown options.In the Archive study dialog box, select the
 Archive button.
Or select Cancel to exit the dialog box.
Restore an archived study
 To restore a previously archived study:
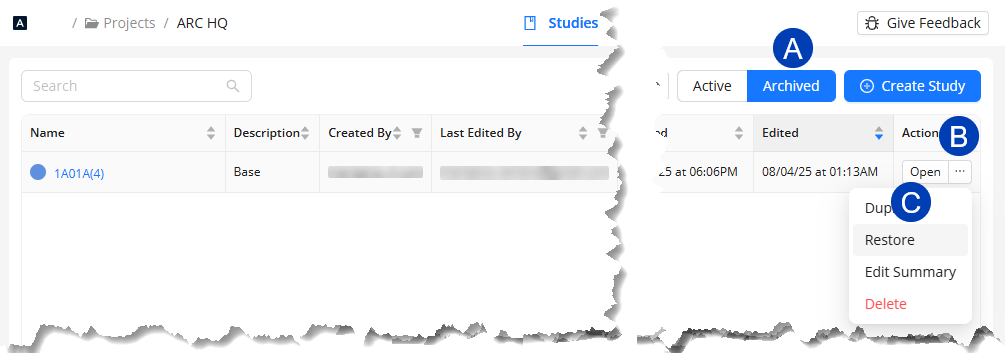
In the Project view, click the
.png) Archived button to view all archived studies.
Archived button to view all archived studies.Under the Actions column, hover over the
.png) ellipsis for the archived study you want to restore.
ellipsis for the archived study you want to restore.Select
.png) Restore from the dropdown options.
Restore from the dropdown options.In the Restore study dialog box, select the
 Restore button.
Or select Cancel to exit the window.
.png)
Delete a study
Deleting a study permanently removes it from ACP, helping users declutter their project by eliminating outdated or unnecessary studies.
Once a study has been deleted, it cannot be retrieved.
In the Study view, you can only delete a study with generated solutions. Here’s how: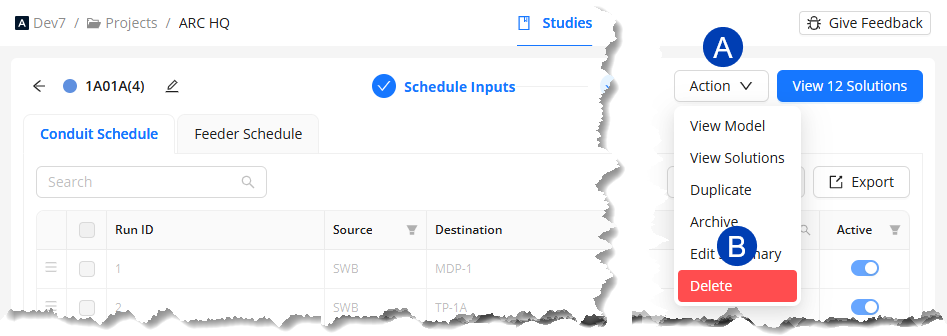
Hover your mouse cursor over the
Action dropdown at the top.Select the
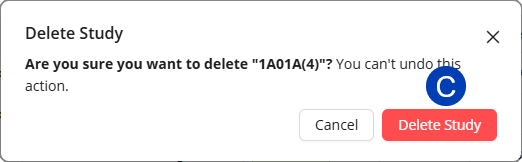
Delete option.In the Delete Study dialog box, select the
.png) Delete Study button.
Delete Study button. Or select Cancel to exit the dialog box.
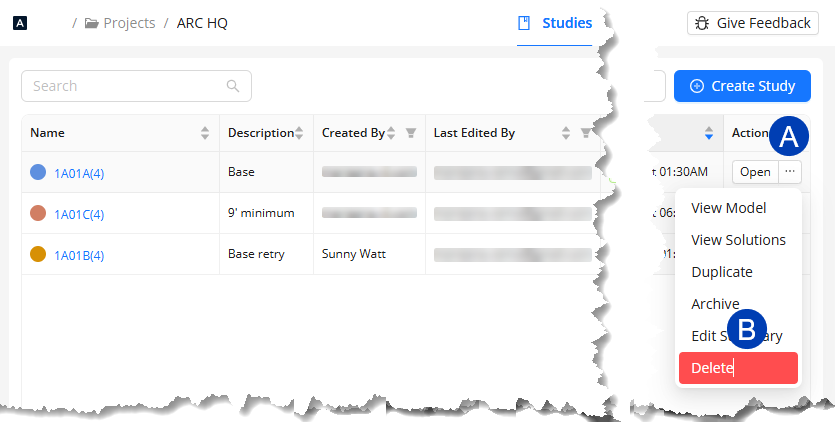 From the Studies table within the Project view, a study can be deleted at any stage of the ACP workflow. Follow the steps below.
Under the Actions column, hover your mouse cursor over the
ellipsis for the study to be deleted.Select
Delete from the dropdown options.In the Delete Study dialog box, select the
.png) Delete Study button.
Delete Study button. Or select Cancel to exit the dialog box.
Not all users will have access to the Delete feature. The ability to delete a study may depend on your ACP user settings. For more information contact support@augmenta.ai