Rule Templates in ACP allow users to define and store sets of Design rules which can be used across projects and studies. These can be organized into folders to manage different rule configurations based on project and study needs.
This guide provides a step-by-step process for working in the Rule Templates tab.
Create Rule Template Folders and Subfolders
The folder structure in the Rule Templates tab can have up to two levels: the first level is the Root Folder, and the second level is the Subfolder. You can create Rule Templates in either of these two.
Refer to the sections below for step-by-step procedures of creating a Root Folder and a Subfolder.
Create a new root folder for Rule Templates
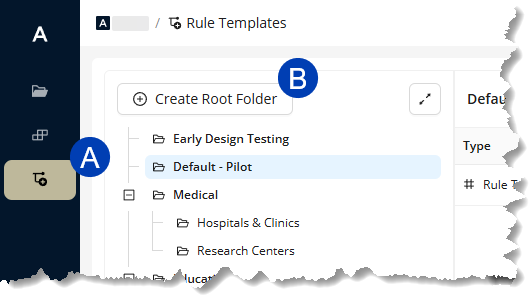
Navigate to the
 Rule Templates tab in the left sidebar.
 Select the
.png) Create Root Folder button at the top of the folder organization panel.
Create Root Folder button at the top of the folder organization panel.Provide a
 Name for the new Root Folder.
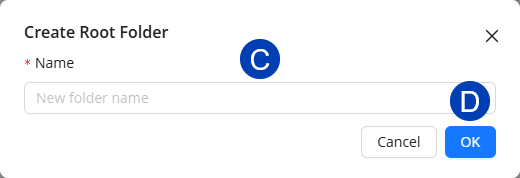
Select
 OK to confirm the creation of the root folder.
Or select Cancel to exit the root folder creation process.
Create a subfolder for Rule Templates
You can create a subfolder in both the folder organization panel and the Rule Template table. Follow the steps below.
Navigate to the
 Rule Templates tab in the left sidebar
 .png) .
. .png)
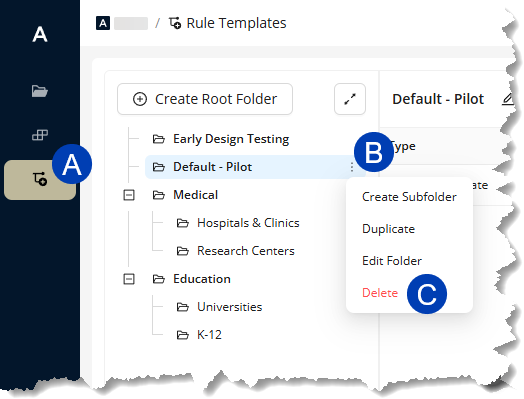
Hover your mouse cursor over an existing root folder.
Select the
 vertical ellipsis on the right edge of the folder name.
Select
 Create Subfolder.
Provide a
 name for the new subfolder.
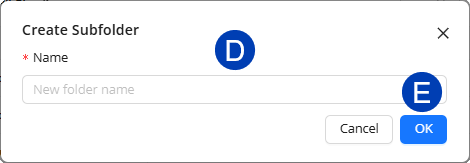
Select
 OK to confirm the creation of the subfolder,
Or select Cancel to exit the subfolder creation process.
Navigate to the
 Rule Templates tab in the left sidebar.
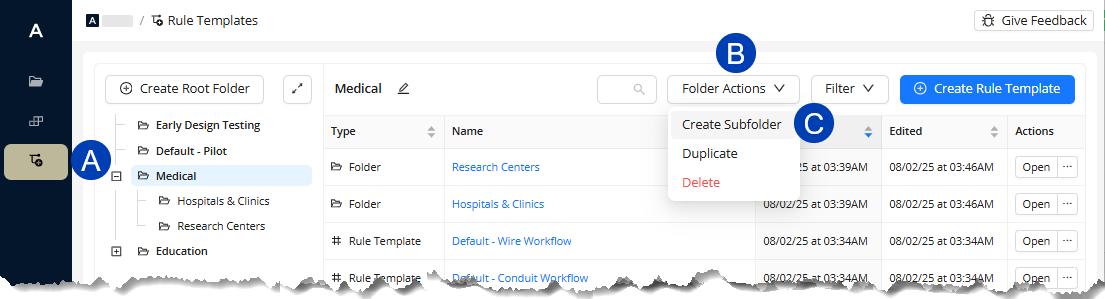
Open the root folder for which to create a sub-folder.
Hover your mouse cursor over the
 Folder Actions dropdown at the top.
Select
 Create Subfolder.
Provide a
 name for the new subfolder.
Select
 OK to confirm the creation of the subfolder,
Or select Cancel to exit the subfolder creation process.
Manage Rule Template Root Folders & Subfolders
In the Rule Templates tab, both Root Folders and Subfolders can be duplicated, edited, or deleted using the steps described in the sections below. Subfolders, unlike Root Folders, can also be moved to a different Root Folder.
Duplicate an existing folder
You can duplicate a root folder in both the folder organization panel and the Rule Template table. Follow the steps below.
Navigate to the
Rule Templates tab in the left sidebar.Hover over the folder you want to duplicate.
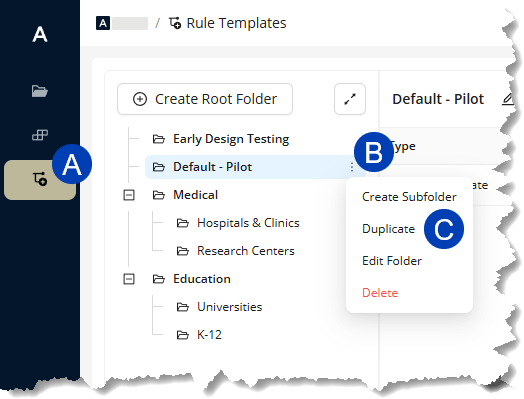
Select the
.png) vertical ellipsis which appears on the right edge of the folder name.
vertical ellipsis which appears on the right edge of the folder name.Select
Duplicate.Override the
.png) Name for the duplicated folder.
Name for the duplicated folder.If you’re duplicating a Subfolder, select a Root Folder in the
 Copy to dropdown where the duplicate will be placed.
.png)
Select
 Copy to confirm the duplication of the root folder.
Or select Cancel to exit the folder duplication process.
Navigate to the
Rule Templates tab in the left sidebar . .png)
Open the folder you want to duplicate.
Hover your mouse cursor over the
 Folder Actions dropdown at the top.
Select
Duplicate.Override the
Name for the duplicated folder.If you’re duplicating a Subfolder, select a Root Folder in the
Copy to dropdown where the duplicate will be placed.
Select
Copy to confirm the duplication of the root folder.Or select Cancel to exit the folder duplication process.
Edit an existing folder
You can edit a root folder in both the folder organization panel and the Rule Template table. Follow the steps below.
Navigate to the
Rule Templates tab in the left sidebar. 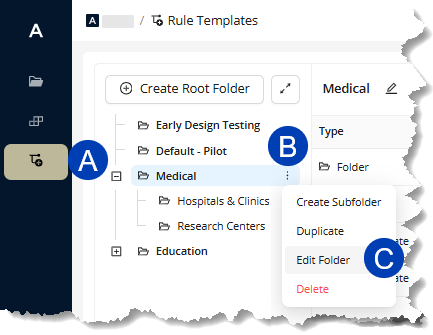
Hover over the folder you’d like to edit.
Select the
vertical ellipsis which appears on the right edge of the folder name.Select
Edit Folder.Override the
name for the Root Folder. 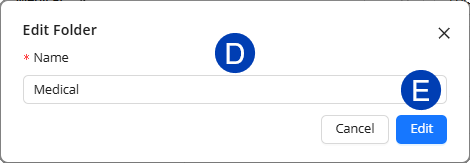
Select
.png) Edit to confirm the update of the root folder.
Edit to confirm the update of the root folder.Or select Cancel to exit the folder update process.
Navigate to the
Rule Templates tab in the left sidebar. 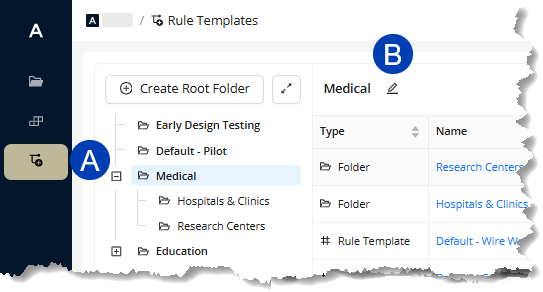
Open the folder you want to edit.
Click the
 Edit Folder button.
Override the
 name for the Root Folder.
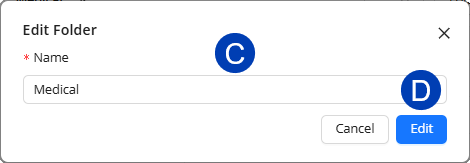
Select
Edit to confirm the update of the root folder.Or select Cancel to exit the folder update process.
Delete an existing folder
You can delete a root folder in both the folder organization panel and the Rule Template table. Follow the steps below.
Navigate to the
Rule Templates tab in the left sidebar.Hover over the folder you want to duplicate.
Select the
vertical ellipsis which appears on the right edge of the folder name.Select
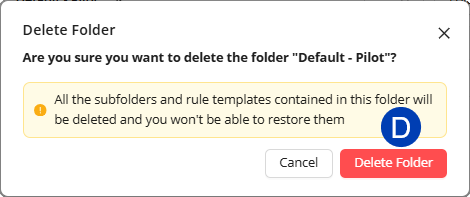
Delete.Select
.png) Delete Folder to confirm the deletion of the root folder.
Delete Folder to confirm the deletion of the root folder.Or select Cancel to exit the root folder deletion process.
 Navigate to the Rule Templates tab in the left sidebar .
 Open the folder you want to delete.
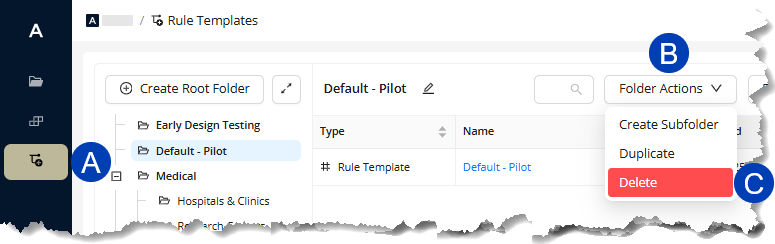
Hover your mouse cursor over the
 Folder Actions dropdown at the top.
Select
Delete.Select
Delete Folder to confirm the deletion of the root folder. Or select Cancel to exit the root folder deletion process.
.png)
Move a Subfolder to a different Root Folder
To move an existing Subfolder from one Root Folder to another, follow the steps below:
Navigate to the
Rule Templates tab in the left sidebar. 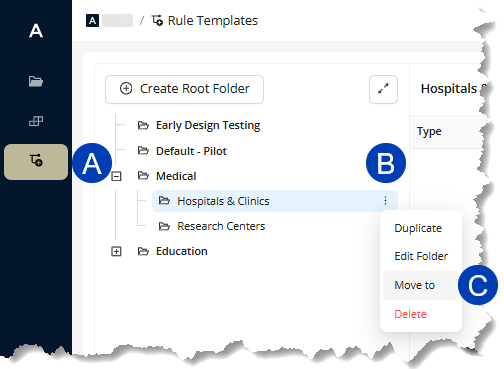
Hover over the subfolder you’d like to move.
Select the
vertical ellipsis which appears on the right edge of the folder name.Select
Move to.From the dropdown, select the root folder to which the subfolder should be moved.
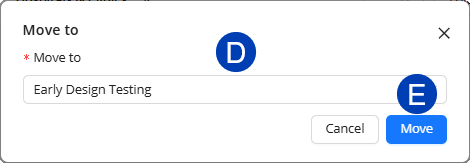
Select
Edit to confirm the update of the root folder.Or select Cancel to exit the subfolder update process.
 Navigate to the Rule Templates tab in the left sidebar .
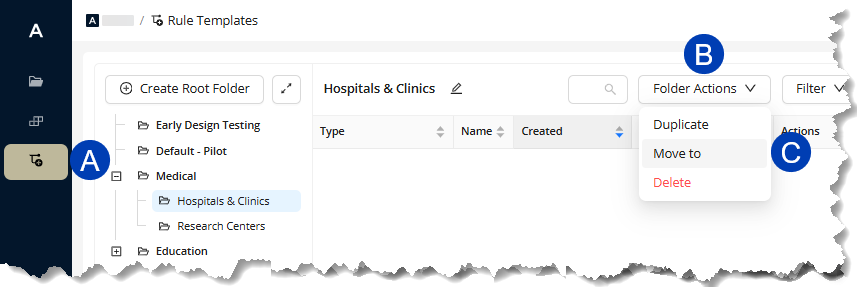
 Open the subfolder you want to move.
Hover your mouse cursor over the
Folder Actions dropdown at the top.Select
Move to.From the dropdown, select the root folder to which the subfolder should be moved.
Select
Edit to confirm the update of the root folder.Or select Cancel to exit the subfolder update process.
Create a Rule Template
To create a Rule Template, follow the steps below.
Navigate to the
 Rule Templates tab in the left sidebar.
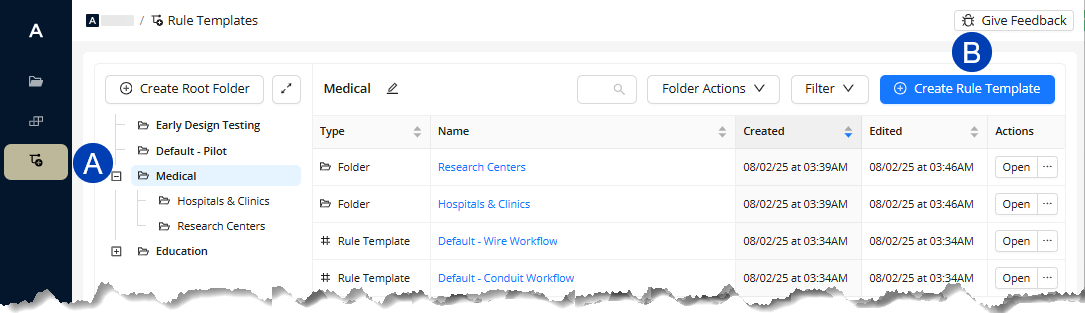
 Navigate to and select the folder in which to store the new Rule Template.
To create a new folder, follow the steps outlined above.
Click the
 Create Rule Template button.
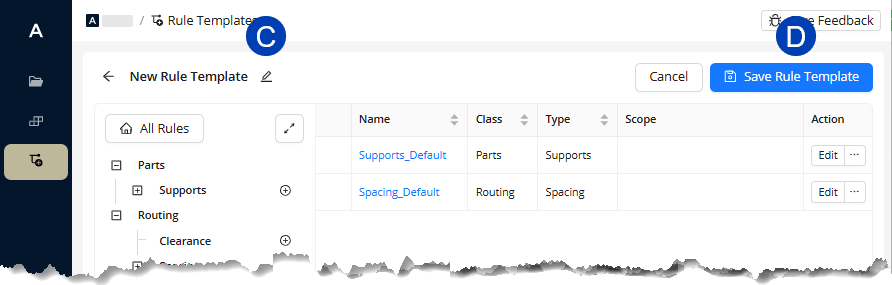
At the upper left corner of the Rule Template viewer, click the
 edit button to change the “New Rule Template” name.
Proceed with the steps outlined in the Add Design Rules to a Rule Template section to create design rules for the template.
Select the
 Save Rule Template button to save the Design Rules as a Rule Template .
Or select Cancel to exit out of the Rule Template creation process.
Add Design Rules to a Rule Template
A newly created Rule Template will have a design rule for each design rule type by default. Each design rule type can have more than one design rule. You can create design rules by following the steps below:
In an existing Rule Template, created using the steps above, click the Create Rule
 button corresponding to the design rule type for which you want to create a design rule.
.png) In the Create Rule window, enter the
In the Create Rule window, enter the  Name for the design rule.
Click
 OK to create the design rule.
Or select Cancel to exit the design rule creation process.
When the design rule is created, it will be enabled
 by default and appear on the Design Rules table. Click it to open the design rule settings.
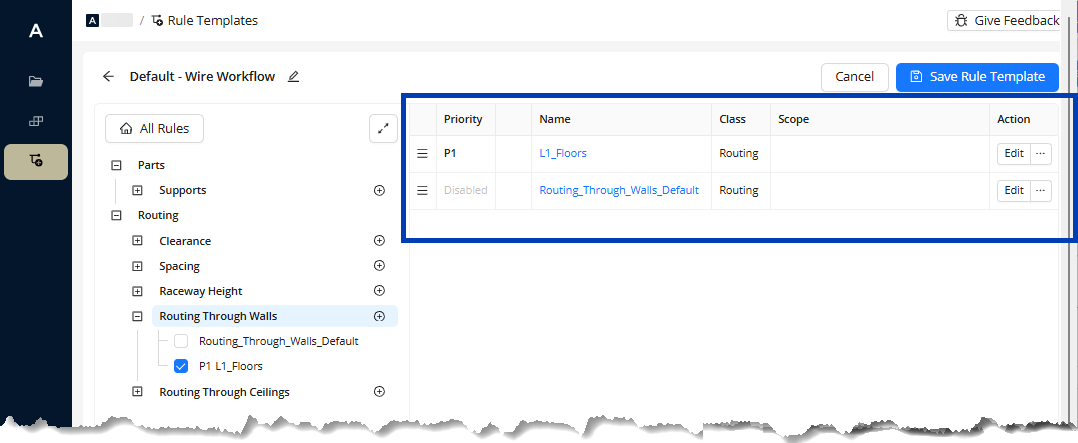 Configure the settings for the design rule. The settings are different for the design rule types. Each one has one or more of the following field types:
Dropdown - Contains all possible values from which you can choose a value for the field.
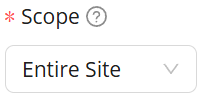
These have a down arrow on the right side of the field, and is used for the following:All Design Rules: Select a Scope for which to apply the design rule.
Supports Design Rule: Select a Support spec which can be used for the study.
Clearance and Raceway Height design rules - Select the Systems for which to apply the design rule.
 Textbox - Allows users to manually enter measurements for Clearance, Spacing, and Raceway Height design rules. Up and down arrows used to increase or decrease the measurement appear on the right side of the field when you hover your mouse cursor over the textbox.
Toggle switch - Enable
 or disable
  the Routing Through Walls and Routing Through Ceilings design rules.
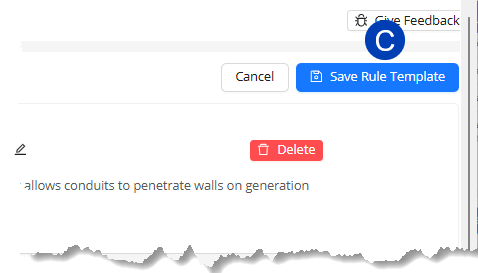
Refer to the Setting Design Rules article for more detailed instructions on adding design rules.
After configuring the settings, click the
 Save Rule Template button.