Creating a project in the ACP platform is the first step in setting up a conduit routing analysis. Each project includes basic details for internal tracking and serves as a container for the studies you’ll create, keeping everything related to the same job in one place. Project information may be modified at any time to account for any changes or new details.
This guide walks you through the process of creating a project, entering the details, modifying the information, as well as deleting existing projects.
Create a new ACP project
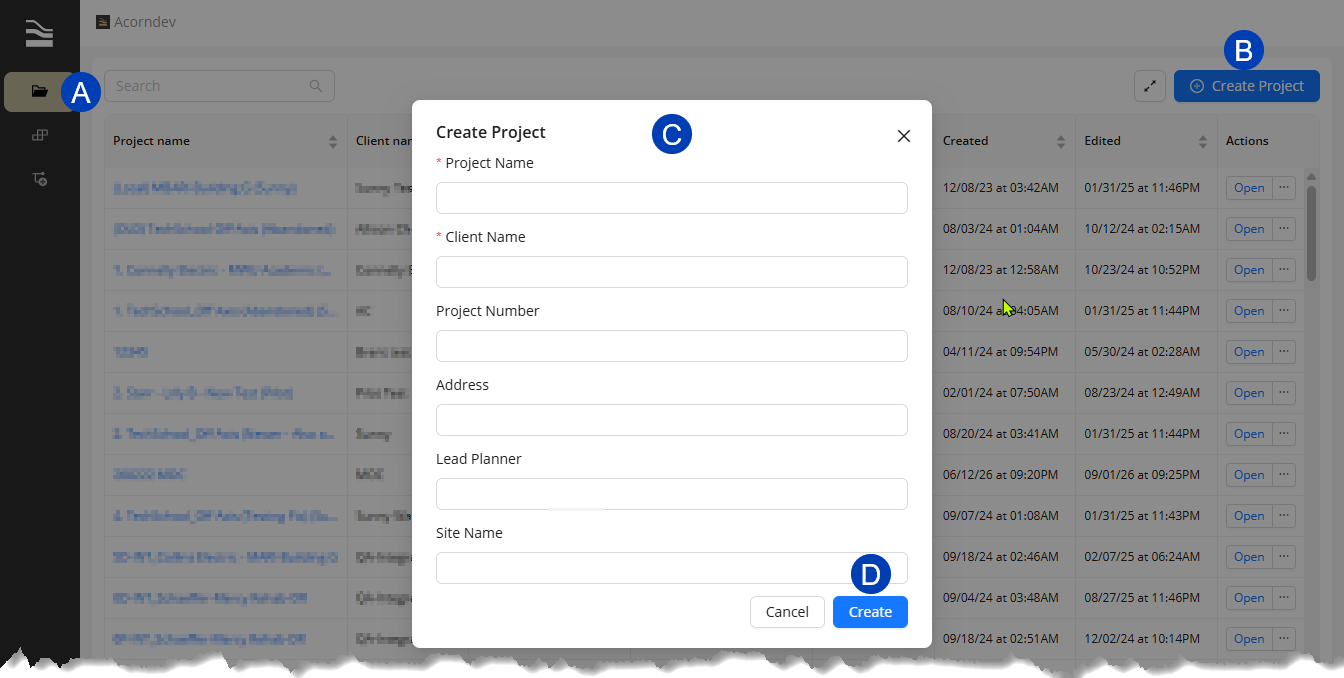
Log into ACP and navigate to the
.png) Projects tab.
Projects tab. .png)
Click the
.png) Create Project button to open the
Create Project button to open the .png) Create Project window.
Create Project window. Enter project details:
*Project Name – A unique name for easy identification.
*Client Name – The associated client’s name.
Project Number – An internal tracking number, if applicable.
Address – The project’s location.
Lead Planner – The primary contact for project planning.
Site Name – Specify if the project is part of a larger site.
Any field prefixed with a (*) is required.
Click
.png) Create to finalize. Once you’ve created the project, the project view will open, and you are ready to create a Study.
Create to finalize. Once you’ve created the project, the project view will open, and you are ready to create a Study. Or Click Cancel to exit without saving.
Update ACP project details
You can update the project details in ACP when correcting errors, refining scope, or accommodating changes in client information, project ownership, or team assignments.
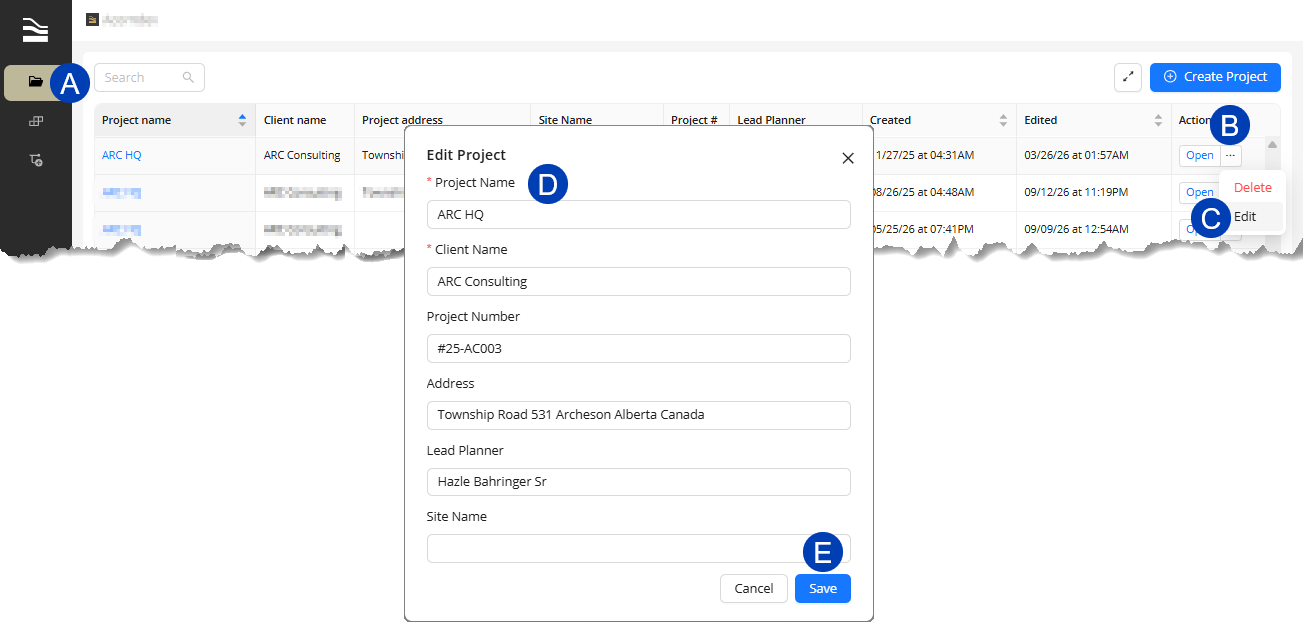
Log into ACP and navigate to the
.png) Projects tab.
Projects tab. Navigate to your project within the Project List View.
Hover over the
.png) ellipsis next to Open, which reveals options to Delete or Edit the project.
ellipsis next to Open, which reveals options to Delete or Edit the project. Select
.png) Edit to open the Edit Project window.
Edit to open the Edit Project window. Update
.png) project details.
project details.Click
.png) Save to finalize, or Cancel to exit without saving.
Save to finalize, or Cancel to exit without saving.
.png)
Log into ACP and navigate to the
.png) Projects tab.
Projects tab. 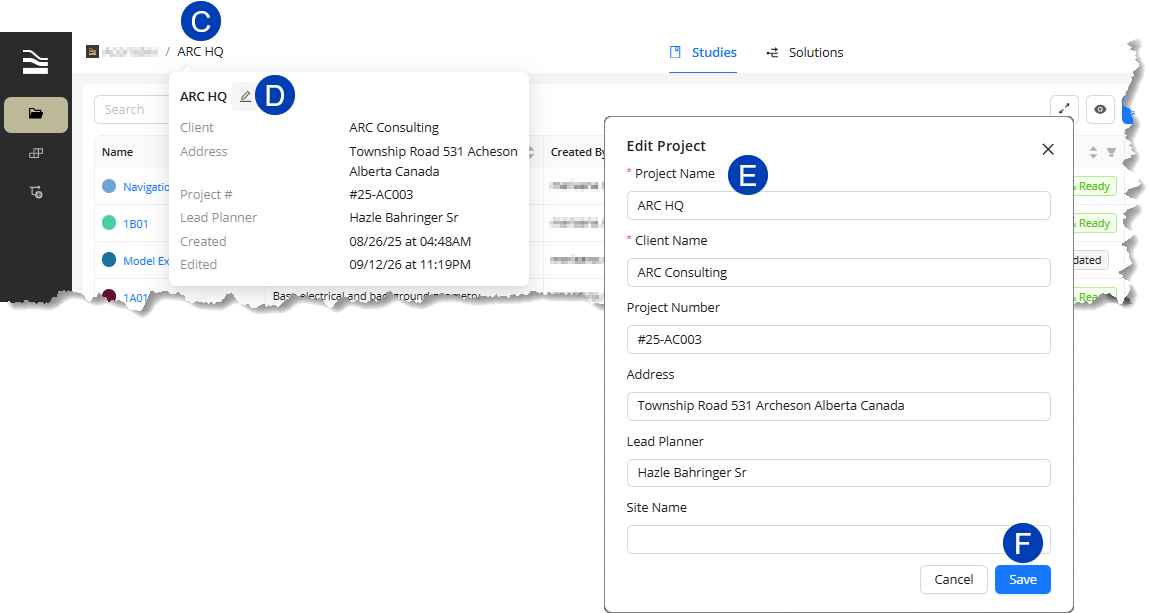
Click on the
.png) project name within the Project List View.
project name within the Project List View.Or on the
.png) Open button to the right of the project name.
Open button to the right of the project name.
In the Study View, hover over the
.png) project name in the top banner.
project name in the top banner.Click the
.png) Edit button next to the project name in the popup which appears.
Edit button next to the project name in the popup which appears. Update the
.png) project details.
project details.Click
 Save to finalize, or Cancel to exit without saving.
Delete an ACP project
To delete incorrect, outdated, or accidentally created projects, follow the steps below:
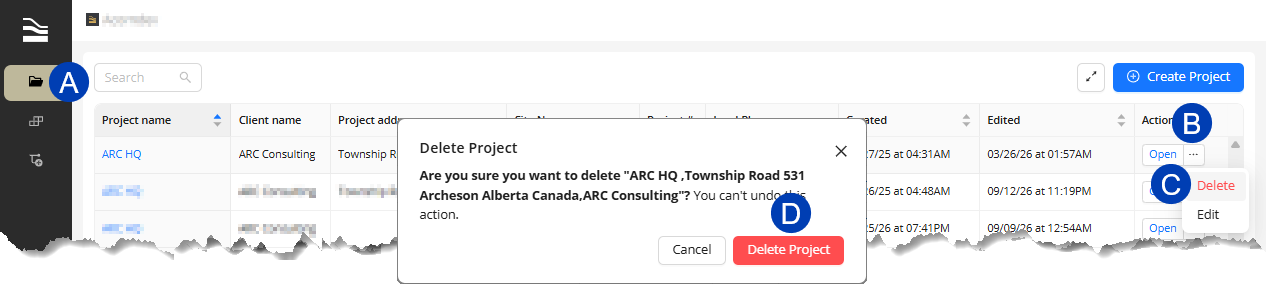
Log into ACP and navigate to the
.png) Projects tab.
Projects tab. Navigate to your project within the Project List View.
Hover over the
.png) ellipsis next to Open.
ellipsis next to Open.Select
 Delete to open the Delete Project window.
 Select Delete Project when the window appears.