The Augmenta tab in Revit provides tools for project setup, routing preferences, and managing conduit data. It’s organized into four panels: Setup, Guidance, Edit, and Information. Each panel contains tools used at specific stages of the ACP workflow including initializing the project, defining routing preferences, and interacting with ACP-generated solutions.
This guide walks you through the broad functions of each tool.

Setup panel
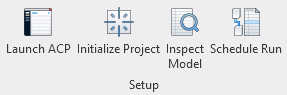
Activates the ACP plugin and enables all functionality within the ribbon.
Sets up the project by adding required shared parameters, views, families, filters, and schedules necessary for ACP to operate.
Inspect Model

Helps review the ACP-Import view for High-Detail Elements and Unexpected Categories.Schedule Run
.png)
Streamlines raceway scheduling and Source/Destination placement by connecting the workflows between the Revit project and the ACP study’s Conduit Schedule.
.png)

Guidance panel
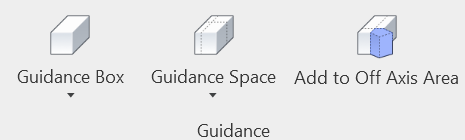
ACP’s routing tools allow users to define preferred pathways, restricted zones, and mandatory routes for conduit. These tools are used as part of the Automatic Routing workflow.
For step-by-step instructions on how to use these tools, refer to the Using the Guidance Tools article.
Guidance Boxes
Preferred Box

When multiple routes are possible, a Preferred Box tells ACP to prioritize a route that runs through this box if it doesn’t negatively impact the overall route.
Specific conduit runs may be forced to route within the box by assigning the Run ID in the Conduit Schedule to the Named Preferred Box.
May Route Box
.png)
Gives ACP the option to penetrate collision geometry, rather than route around it.
Keep Out Box
.png)
Creates an area where conduit routing should be avoided.
ACP will only route through Keep Out Boxes to connect to a source or destination within.
Guidance Spaces
Add Preferred Spaces:
.png)
When multiple routes are possible, Preferred Space tells ACP to choose a route that runs through this space.
If it doesn’t negatively impact the overall route.
Add Keep Out Spaces:

Assigns a space where conduit routing should be avoided.
Remove Guidance Space:

Removes the Preferred/Keep Out setting from the selected spaces, returning them to an unassigned state.
Add to Off Axis Area
Add a Guidance Box to an Off-Axis mass

Rotates the Guidance Box to the axis specified within the Off-Axis mass, and assigns the Guidance Box to the Off-Axis mass.
Edit panel
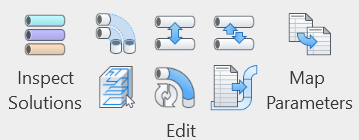
Inspect Solutions

Creates and applies temporary filters to the active view to highlight elements containing properties from the ACP Schedule Inputs.Trim Conduit

Places the needed conduit and conduit fittings to connect segments of conduits and racks togetherSpace Conduit

Adjusts the spacing between conduits in a rack based on the conduit size.Swap Conduit

Exchanges the position of segments from two runs of conduit within a rackSelect Generated Raceway
.png)
Selects all elements that were exported from the ACP Project into the Revit project.
Convert Bends

Converts the ACP bends in the exported conduit solution into custom bend families for spooling and prefabrication.Push Properties
.png)
Updates conduit runs to have consistent properties in the model and schedules.Map Parameters

Transfers parameter values from a source parameter to a target parameter within selected elements
Information panel

About: Displays information about the ACP add-in .png) :
: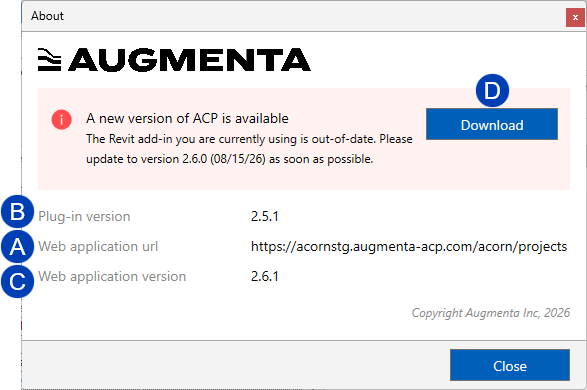
.png) Shows the URL, which can be used to access the web based application through a browser.
Shows the URL, which can be used to access the web based application through a browser.It keeps track of the version of the add-in currently installed
.png) and compares against the version of the ACP Workspace on the web
and compares against the version of the ACP Workspace on the web .png) to ensure they are in sync.
to ensure they are in sync..png) If the add-in and web versions of ACP are different, Download the latest version of the add-in. Refer to the Updating the ACP add-in article for more information.
If the add-in and web versions of ACP are different, Download the latest version of the add-in. Refer to the Updating the ACP add-in article for more information.